A clarification/FYI
First off, in most other blogging platforms, gadgets are usually called widgets -- so if I accidentally lapse into calling them widgets, or if you hear someone else referring to widgets, that's why. In Blogger, they are gadgets - and those are all the little extras you can add to the layout of your blog -- in the header, sidebars, and footer areas.Let's add a gadget!

Anywhere you see "Add a Gadget", you can click that, which will bring up a dialog box of gadget choices.
In this example, I clicked the "Add a Gadget" to the right of "My Posts".

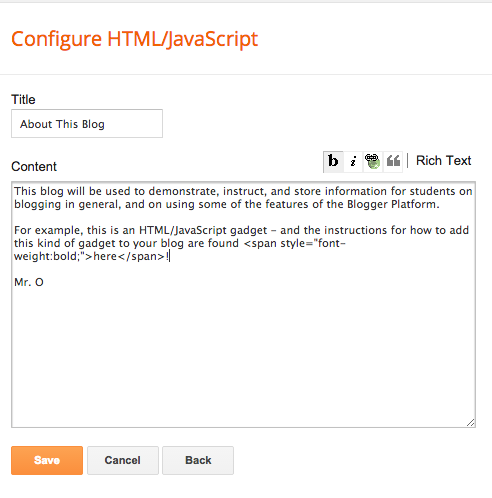
For the content, I am writing a little blurb about the purpose of this blog, and am making a link to this post you are viewing now.
Making anything bold or italics actually inserts HTML/CSS code to make it. Don't let that freak you out.
I'm coming back to this gadget, but for now, I'm pressing Save.
Moving a gadget


Dragging the gray bars lets you reposition gadgets anywhere in your layout.

The result (so far)

You can see the HTML/Javascript gadget ignored my blank lines. That's just an HTML thing - we'll fix that in a minute.
I'm also going to publish this post I'm writing, and then go click on it to see what the URL is for my link (the word "here"). BRB....
Adding a link
OK, I viewed this post and copied the URL from the browser's address window. It's:http://studentblogdemo.blogspot.com/2014/12/adding-htmljavascript-gadget.html
Now let's go back to the layout, and edit this gadget again. You may also instead click the little "tools" icon at the bottom-right of the gadget.

I put the cursor there where I wanted my link - and then pressed the link button (to the right of the "i" button.)

OK.

Remember how HTML ignores blank lines? Wrap each paragraph with a <p> tag and a closing </p> tag. One guess what "p" stands for... And for the record, "/" is a slash.
The finished result

The p tags made my blank lines between paragraphs, and my link - the word "here" is now clickable -- linking to this post.
You can make links to whatever you want - your other posts or pages, or other websites.
When to use this gadget
Blogger has a lot of great gadgets to do useful things on your blog. But, if you need something more custom-made that doesn't really fit one of the other standard gadget types, try an HTML/Javascript gadget.If you don't need to format your text or make links, you could just use a Text gadget, instead.
Until next time....
No comments:
Post a Comment