Showing posts with label tutorial. Show all posts

Monday, February 5, 2018

Making and installing your custom favicon

What's a Favicon?

FAVorites ICON

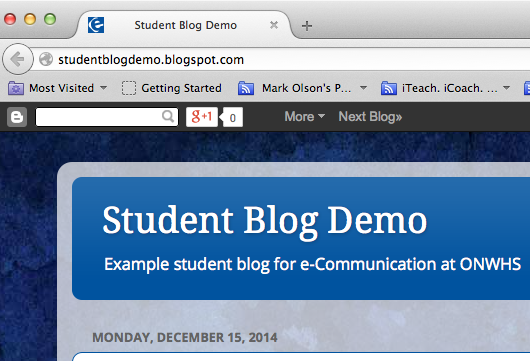
The favicon is a very small, square graphic that shows up in browser tabs and other places - favorites (bookmarks), other blog feeds, and more.

You may make your own favicon, and install it on your blog.


The trick is to remember two words:
  1. Square -- The favicon must be square - Blogger will not accept it if it is even 1 pixel off. 
  2.  
  3. Simple --To turn out legible at such a small size, it must be simple - in shape and in color.  Favicons are sometimes one letter, or a simplified version of a logo or icon.

You can make it in either Photoshop or Illustrator, though you will probably have better results with Illustrator. The example below is done with Illustrator.

Start with a square image - at a size easy to work with.

Transparency is allowed (PNG and GIF do transparency, JPG no) but I usually avoid it when making favicons.

So, start out with a square artboard in Illustrator. I used 400px x 400px. Create.


*** There is a setting you need to tweak so that things won't turn to mush when we shrink this thing down to icon size:
Before you start working, go up to Adobe Illustrator > preferences > general >make sure the two checkboxes to resize corners and resize strokes and effects are checked.
To make a favicon of your initial, type the initial, and size it to fit in the artboard. If things are happening that you don't want, you may need to reset the character panel. (Click the hidden menu in the upper-right, and at the bottom, choose Reset.)

Anti-Aliasing is what is used to smooth out curves by adding in a lot of in-between colors. Normally this is a good thing. You'll see different options - sharp, crisp, and strong.

Probably, once this is sized down very small, it will actually look cleaner without any anti-aliasing, so choose none. The edges will look jagged and blocky, because now illustrator is only using one color for the edge.
Right now, the artboard is the only thing in back.

Use the rectangle tool to make a square, with any fill color that you want. Make sure you have contrasting color between the rectangle and your initial in the foreground.

After the rectangle is made, right-click it and Arrange > Send to Back.

Open up your artboards panel.

Make a new artboard by clicking the icon next to the trash can.


Click (double-click?) the names of your artboards to rename them.
Up in the bar, resize the W and the H of your favicon artboard to 16px by 16px.
Select both your rectangle and your initial (drag a box around them both, or click one and then shift-click the other) - and then Option-Drag to make a copy of your work.

Holding down Shift, start sizing down your rectangle and initial to fit on the small artboard.
Zoom way in on your favicon artboard, and make sure that the rectangle and the initial are fitting entirely on the artboard.
Now you can zoom back out to 100% size, and check to see if the None option for anti-aliasing is what you want. You can open the character panel and try on of the other options. Go with whatever looks cleanest when you are viewing it at its actually tiny size.

Does it look best with antialiasing?
...
or without?
When you are ready, File > Export > Save for Web. Use PNG-24, and uncheck transparency.

Make sure you have Clip to Artboard checked.

Make sure the size is 16px x 16px.

If something looks wrong, go back and fix it.

In this case, my square and letter were not fitting exactly on the artboard.
I went back, selected the rectangle, opened the shape panel, and set it back to 16px by 16px, and then made sure the square fit exactly to the artboard.

I also then had to move the initial over a bit.

To get things to fit the way you want, you may need to uncheck snapping - under View in the main menu.
Now when I Save for Web, it looks better.


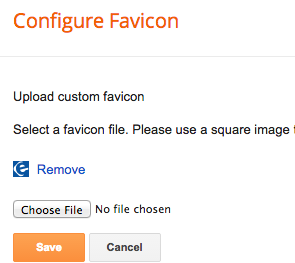
Go to your layout settings in Blogger, and select your icon for the Favicon gadget.


You may not see it change right away in your browser tab.  If you are in Chrome or Firefox, Command-Shift+Delete will clear the browser cache and history, and force it to reload your new favicon.  (It will also log you out of Blogger, though.)

Websites nowadays actually can use several different sizes of favicons for different purposes - one for tabs, another for icons on a tablet, another for mobile devices, etc.

If you open up your blog on a device that uses a larger size (which will make your 16x16 look fuzzy), let us all know please! Leave a comment below, and we can modify these instructions for a bigger save size.

Have fun personalizing your blog with a favicon!  As with everything else, keep it classy.
If you'd like to find out more of the finer points of favicons for website use, this is a good page: Create a favicon for your site in 8 steps


Monday, November 30, 2015

Make a Bio page!

Pages?  We don't need no stinking pages!

Badges?
We don't need no stinking badges!
(Name that movie.)  Well, yes, we do need pages. So far on Blogger, you've been primarily making use of posts. Posts are the most common way to update a blog. They appear on your home blog page, and with time they get pushed down and off the main page by more current posts. Pages are more of a static entity. They stay put, and they are accessible by name from a menu on your site. You can put as much or as little on a page as you like - and you can add to them or edit them over time.

We will make a page for your Bio information, along with a handy link to it near the top of your blog.


Make a PAGE


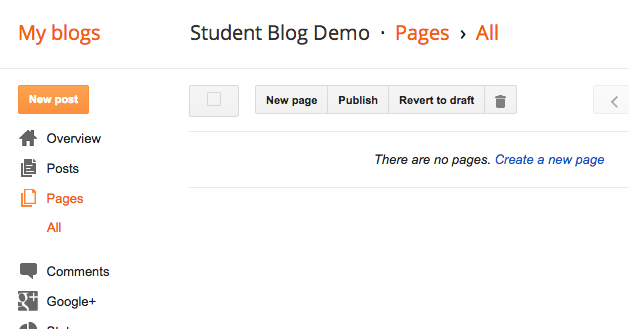
In your design menu, go to Pages, and then press the New page button at the top.


Name your page - About Me and Bio are typical names for this. You can always rename it later.

(This example was for something different.)


Add in the Content


Edit the page the same way you have been editing posts. This time, you need a photo (a semi professional one), a paragraph of bio info (you don't need as much as this example), and then your elevator pitch. (If you did not write your elevator pitch yet, the instructions are here.)

You only need 1 paragraph of bio info.
Instead of Skills, copy&paste your elevator pitch in here!


When finished, press the Publish button.

And... nothing happens.

That's because pages aren't blog posts - they come up by choosing them from a menu, as opposed to being displayed sequentially on your home page. So...

Add the Pages Gadget:


Now you need to go to your Gadgets in the layout menu, and scroll down to find the Pages gadget. Click the plus to add it.


This Pages gadget is basically a Pages Menu gadget.

Page names are on the left, and will only appear in the menu if you have their boxes checked.

Once the pages are checked, you may reorder them on the right side.  By convention, you should either place the Home page first or last.

(Yours will be Bio or About Me, instead of Graphics.)

Press Save when finished.


You may either position your Pages menu in one of the sidebar gadget spots, or...


... in a gadget at the top, in which case it looks like either a menu bar or tabs.


If your gadget doesn't show up, try moving it to a different location.


Test out the link in your gadget to make sure it is working.

Revisit your page now and then to keep it updated!


Here's another quick reference from Blogger on some of the details of pages and the pages gadget that were not covered above: Blogger Buzz

Friday, September 18, 2015

Create an HTML Gadget with links and images

Get the files

Head over to this post to get the 2 images you need for this gadget. Once you have them downloaded and saved then you are ready to continue!

What are we doing?

We are going to create a new gadget (widget) for your blog. This gadget contains the HTML (the code behind web pages) needed to show the 2 images, along with links to our websites.

Even though this will be a gadget, we are going to start out creating it in a post, where we will have more room to work, and where we will be able to upload the images.

Upload the images into a new post

Create a new post on your blog.

Click the image icon (to the right of link), and upload the two images from the other post.

Make sure you click on each to get a blue border around them.


In the Compose view of your post, you'll see the two images.

DO NOT:
  • drag the images
  • right or left align the image
  • add captions
  • In fact, don't even click on them.
If you do the above things, Blogger adds a bunch of code to make them happen - and we don't want to deal with that!!

We now switch to HTML mode - and will stay there. Click the HTML button in the above left corner.

(Going back to Compose view and changing anything will cause Blogger to insert extra HTML or modify HTML - making your code look different than that shown in this tutorial.)


Remove the extra code


In HTML view - these are tags. HTML uses tags to set the structure of your page. Tags are enclosed inside a "less than" and a "greater than".


Carefully select and delete the "a" tags, leaving only the "img" tags as shown below. The "a" tag makes a link. In this case Blogger made each image a link to a bigger version of the image, which we don't want for the gadget.


You may also see "div" tags, which you should also delete.

Delete everything except the code shown below -  yours should look just like this!:


Now you should just have the two image (img) tags as shown above.


Add links


Stay in HTML view.


The "a" tag makes links.  
Type in the "a" tags as shown here, three under the first image and three under the second. Also add in the "br" (break) tags as shown. Those are what makes the web browser go to the next line to display whatever is next. 


The actual blank lines in the code above are only to make our code more readable - they won't show up in the browser.


Set image widths and floats


Inside each image tag, after border="0", type a space and then add the parameters shown to set a width of 30% for the image, and to float it to the left. You must get all the punctuation just right, as shown.  If there is a height declared, delete it.


Go up and click on the preview button, and you'll see something like this:


Now that each image floats left, whatever is on the page after it can come up to the right of it (wrap), when there is room.

The e floating left allows the links to come up next to it like we want, but it also made the raven to come up - which we will fix next.


In HTML view, inside the br tags after the sets of 3 links, add in the style shown, like the first one shown here. Clearing makes the browser go below the floated image to place whatever comes next.


Now hit the preview button again.

The br with the added style to clear the floats made the raven appear below the e.


Add an image margin


The links are appearing a little too close to the images, so in HTML view, and inside the quotes for the style in the image tags, add margin:6px;.


Here's how your complete style attribute for the image tag should look now - along with the width.


And here's the complete image tag:


Almost there!

Now if you Preview, it looks pretty good.


Round the sharp corners


The e logo is very rounded, and the raven has sharp corners. Here's how you can round out the corners a bit: Add in one more thing to the code. In the image style, add border-radius:6px;.
Check it with Preview if you want.

Copy the HTML to a gadget


Your code now looks like this. If it does, select it all, and then copy it (command-c).

Save your post, but don't publish it.


Go to edit the Design of your blog.

In that menu, choose Layout.


Find your sidebar, and click Add a Gadget.


From the list of available gadgets (known on most blogging platforms as widgets), choose the HTML/JavaScript gadget.


Paste your code (command-v) into the Content window, and title the gadget.

Press the Save button.


Up at the top, click the View blog button.


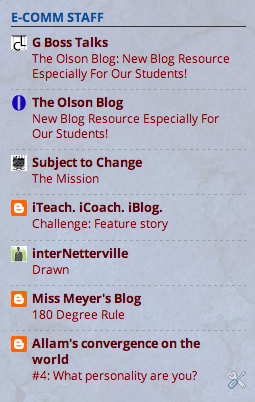
Your gadget should look something like this!

Your fonts, font sizes, and colors will be different than mine, depending on the template that you are using for your blog.


Clean it up


Click the "tools" icon to edit your gadget.


It will look better to make the links line up with the tops of the images, so select the br tag between the image and the first link, and delete it. Do this for both images. Save.


Now we just need to give that heading a little room underneath. Click the edit button again.


Add a br tag as shown, above the first image only.


Testing and done!


Nice!

Test all 6 of your links to make sure they work. This blog gadget is public on the Web when we save it. It's embarrassing to hear from others that one or more of your links don't work. Test all of your links so that you will be the first to know - and then fix them!

If your sidebar is too narrow and the links don't fit well next to the images, you can try changing the width for the images - maybe down to 25% or even 20%.


Purposes of this tutorial

  • It gives you a useful gadget for keeping up with what's going on in e-Comm and ONW.
  • It hopefully gives you at least a fuzzy idea of HTML tags. You used 3 in this tutorial - the a tag to make a link, the img tag for an image, and the br tag to advance to the next line or insert a blank line. We didn't cover the "how" or "why" behind each tag, so don't worry if it seemed complicated or mysterious to you. When we make tags ourselves later on, they will be simpler - and we'll take them one piece at a time. For now, it is enough that you realize that things showing up on web pages are actually generated using HTML tags. Most of the time we have software generating the code for us, but we do need to know enough to look under the hood and tweak things when needed.
  • The other purpose of this tutorial is to demonstrate one way to present a tutorial blog post. To see more examples, click the tutorial label (tag) in the label cloud (tag cloud) to the right.
    To see how your tutorial blog posts are evaluated, go here.